To fetch the complete process you should observe the performance of software at first download and try the evaluation version of software, we are guiding here to run procedure How to Convert NSF to PST perfectly. Follow the straightforward steps.
Step 1
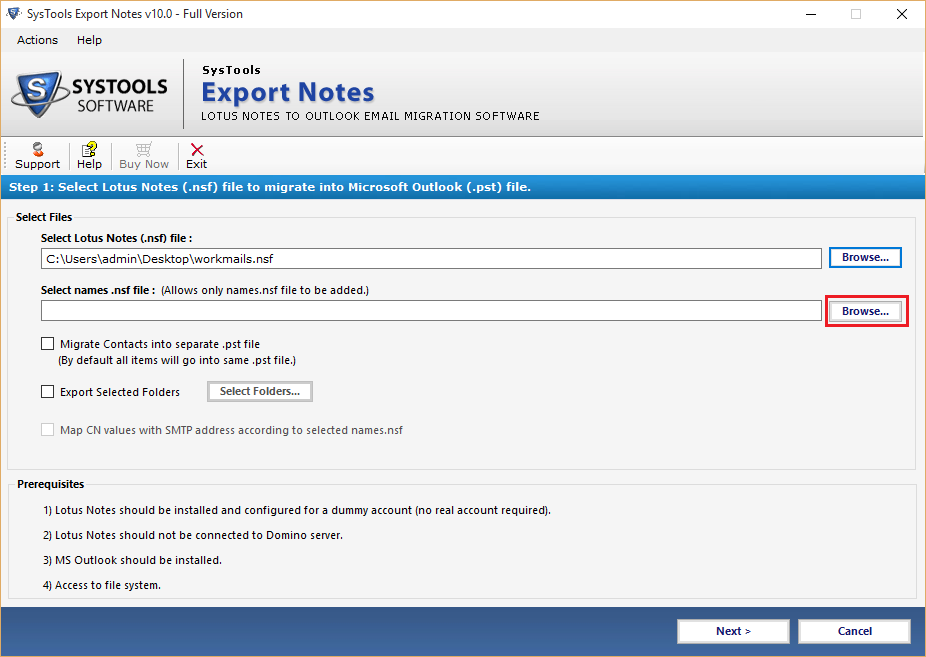
Select Export Notes Software as well as Install into Machine and Launch the Conversion process. Locate and Browse the NSF files from location to convert into PST

Step 2
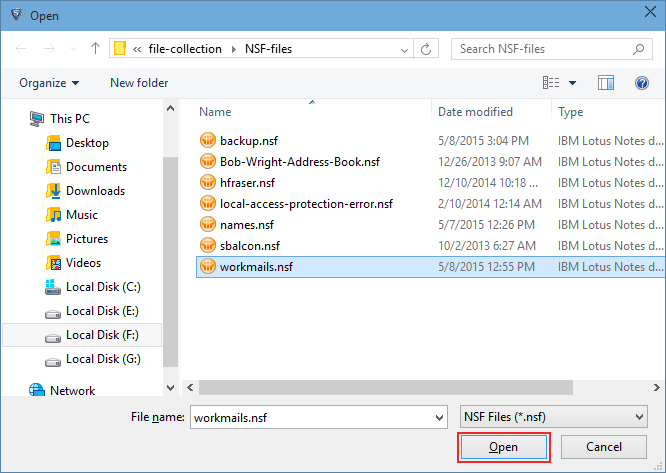
Pick the preferred .nsf files and hit on Open Button.
Step 3
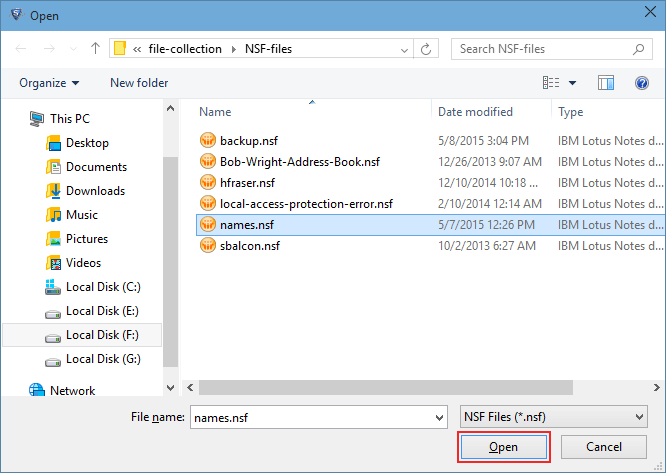
Now also Browse names.nsf address book file to export.

Step 4
In next step open names.nsf from location or from address book.
Step 5
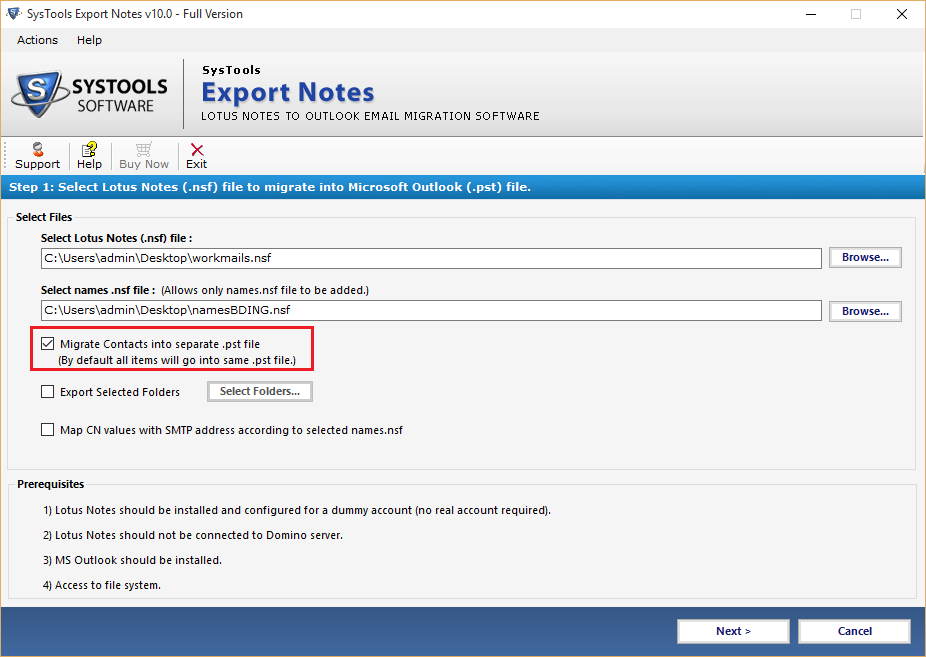
To obtain address book contacts into single PST Folder check the "Migrate Contacts into single File" option.
Step 6
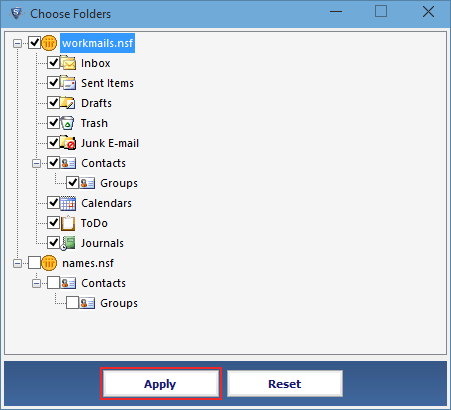
Export selected folder option is there to migrate the all available folder of selected NSF file as well as choose the required folder only. Select or deselect the specific folder and click on apply button. Otherwise by default software migrates all folders to PST.
Step 7
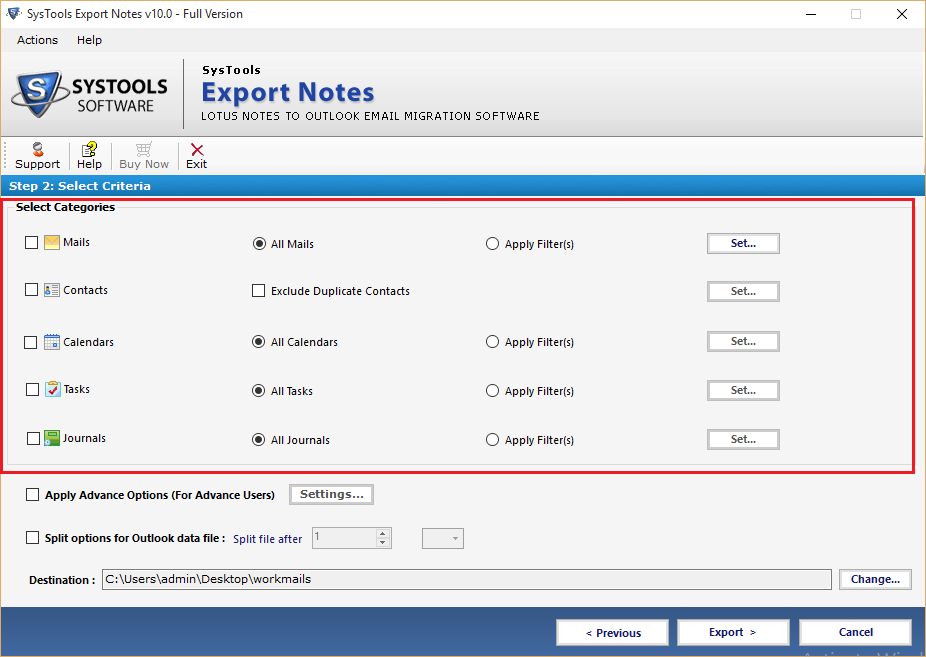
In next screen check or uncheck the categories for specific migration.
Step 8
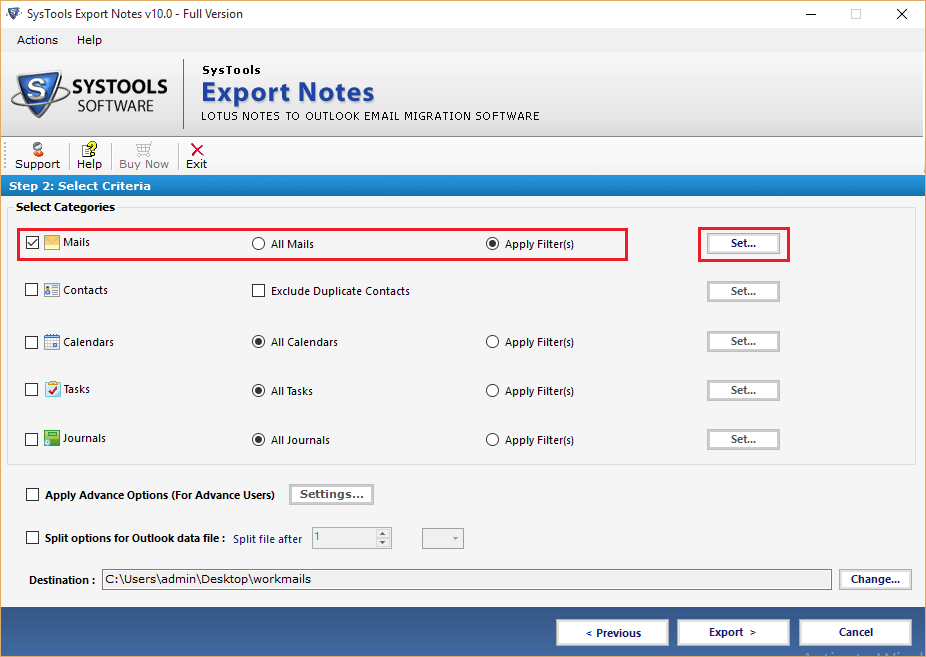
By default software migrate all but if want selected mails, calendar, journals and to do list apply multiple filters for specific date range migration.
Step 9
"Exclude duplicate contacts" option mark it check for the exclusion of duplicate contact entry from migration.
Step 10
Software filters the contacts by pre defined properties of Contacts. Check the required field to filter data.
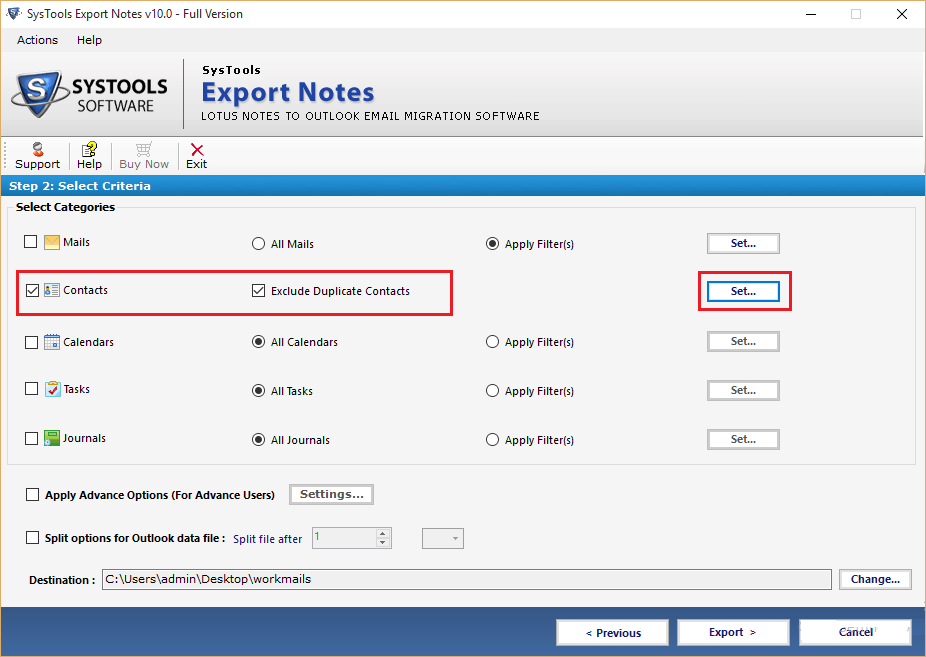
Step 11
Advance setting option is also there to apply various advance settings (preserve HTML formatting, doclinks etc.) by using this option.
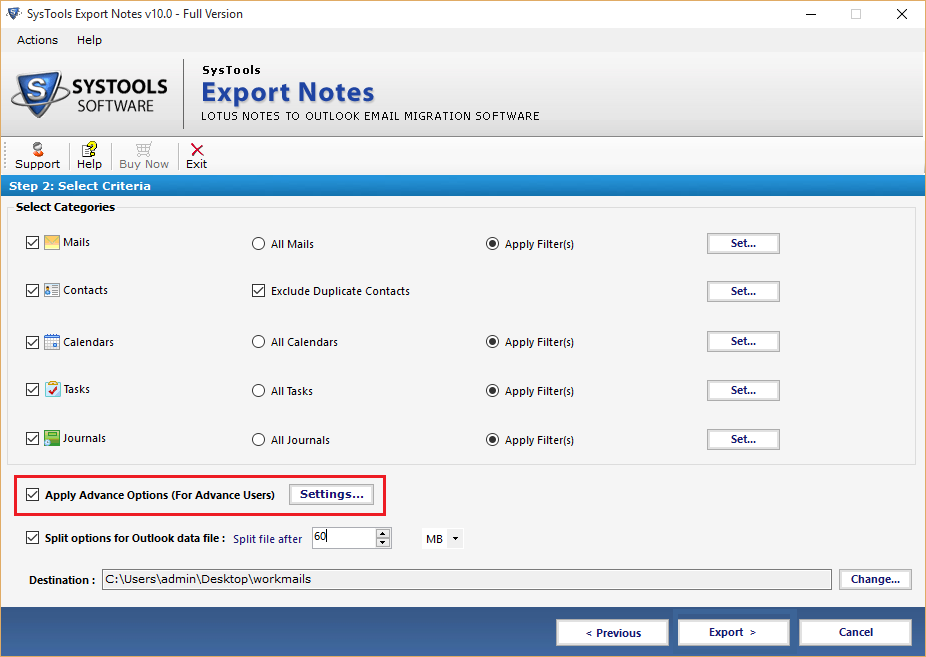
Step 12
Consists advance setting such as: hold HTML formatting of emails, Save Internet header, Remove Encryption of Emails, Export All Document at once and manage Doclinks of emails.
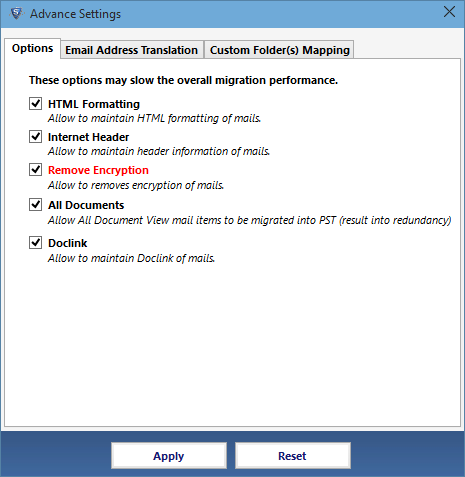
Step 13
In next tab of advance setting option set the SMTP email address for Lotus Notes canonical name. Choose CSV file for multiple canonical names.
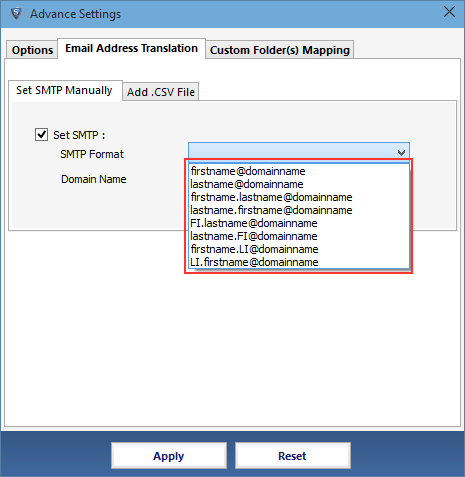
Step 14
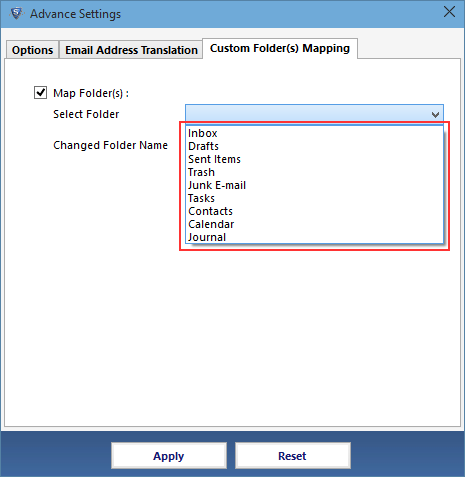
In 3rd tab of custom folder mapping option, software map system folders to user defined (new) folder or into system folders (existing).
Step 15
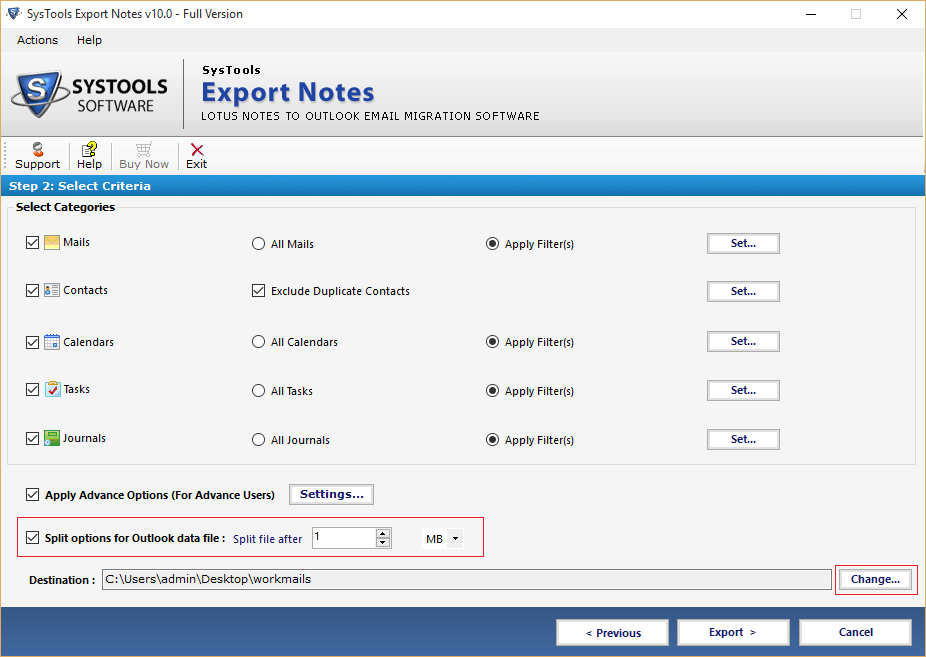
Split option is there to split large size outlook PST data file into smaller pieces. Break the data according to required GB or MB size. Also change the default saving location of PST file by clicking on change button.
Step 16
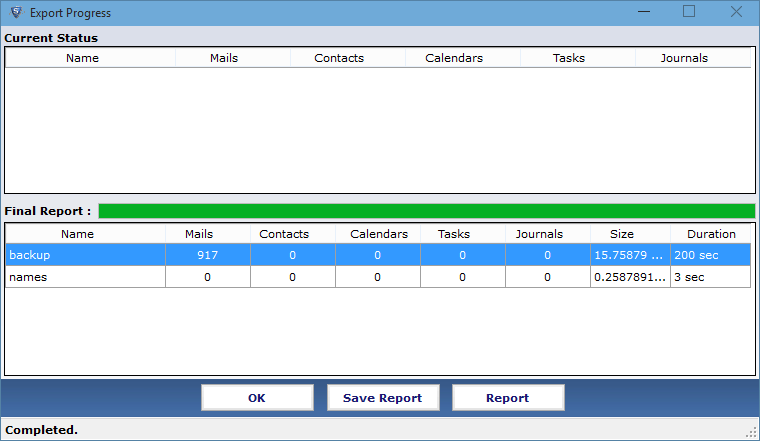
Click on Export button and software start converting the NSF files to desired Outlook PST file.

Step 17
Get the statics of migration process generated by this tool which displays the number of items from folders that is exports to PST Files.
